Do You Appreciate the Finer Points of Life?
Lieutenant Colonel B.G. Hamilton-Russell 17th/21st Lancers
British Army Review, No. 64, April, 1980
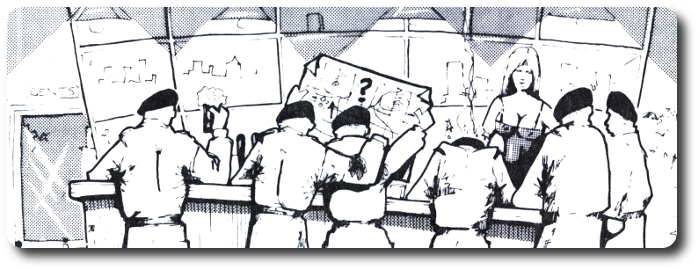
First of all think about the enemy and everything that you know about him. Then put yourself in his mind and look at your area from his end. With your fur hat firmly on your head, do his appreciation for him and work out where he would go…
In the British Army we are very good at studying a great array of theoretical subjects and ensuring that we are 'experts' in, at least, The Theory of Warfare, From our first days at Sandhurst we are subjected to a continual stream of courses, all of which tend to reinforce our own confidence in our ability as military genii. Unfortunately this expertise is almost entirely confined to theory and all too often the very real practical problems of any situation are disregarded. We have had little or no experience of what is euphemistically called General War and it is an unfortunate fact that, on exercises, our theory does not always stand up to the test, even without the disruptive influence of a live enemy.
Nowhere is this better illustrated than in those dreaded words "The Appreciation" and the practicalities of life get swamped in a mass of meaningless verbiage of that insidious non-language so beloved of staff-trained officers. If we remember that success in the next war in Europe may well depend on the appreciations made at various levels for the adoption of a defensive position, the situation is somewhat alarming.
A lot of people who have bothered to read so far may be nodding their heads wisely and saying "I quite agree, but of course it does not apply to me." Well it may not, but as we have not yet said what goes wrong, how do you know whether this particular cap fits or not? Let us look at what all too often happens.
 There are really two separate avenues of error, depending on the qualifications of the Appreciator, but both lead to the same woeful destination. The staff-trained officer may well go through the mental or even written motions of an appreciation as he was taught. Deductions and Conclusions may fly thick and fast but these will be of the point-scoring variety rather than be related to the particular problem in hand. For example 'the enemy will have air superiority and use massed artillery, therefore, I must be well concealed and dug in' is a fact of life and contributes precisely nothing to the siting of a particular position. At the end of the mental gymnastics the Appreciator ends up with a plan that fits very neatly with his initial Situating of the Appreciation when he first looked at the ground - or even the map in the pub.
The pub-produced plan is quite simple. There will be a platoon there, and another there, and so on, merely because each position is a piece of high ground with a convenient little wood on top. Remembering some of the principles of defence, these positions will be in a roughly triangular formation to satisfy depth and will probably be in shot of one another to satisfy mutual support. On to this basic framework are superimposed tanks, Swingfire and Milan all with nice arcs that 'interlock' because the lines that radiate out from their positions cross on the map.
The non-staff trained Appreciator does exactly the same, except that he leaves out the mental gymnastics phase, and therefore, in that both systems are equally wrong, you could argue that his is the more cost effective. You don't believe that this is what happens? Come on, be honest with yourself, and if you are one of the few who really do do anything different, just watch someone else.
"Well all right," you say, "so what if I do do that? I can usually bluff the bones and surely if I have paid at least a lip service to some of the principles of defence it cannot be all that bad, and anyway, I have a good eye for ground and getting it right comes naturally to me."
Well of course it could be worse — but if you are let into a few secrets it could be much better. Just ask yourself, what will actually kill the enemy in war? The answer is not your troops and platoons but your WEAPONS. "Of course," you say, and think to yourself 'these fools are splitting hairs.' Well it is rather more than mere semantics. If you site your organisations and then think up arcs for their weapons you have gone about it all in completely the reverse order of a logical sequence. Your weapons end up where they are because they are part of an organisation — NOT because that is necessarily the right place for them. Is a dimly remembered cry that you should base your framework of defence round weapons (wasn't it anti-armour) coming back into your mind? Oh yes, but we never really understood that and anyway it is far too complicated. What was really needed was a fool's guide to the motions of actually doing it. Now for the good news. After much too long a preamble that is what this article is all about.
It all starts when you get your briefing or orders from your own superior. If you are to take up a defensive position there are certain bits of information that you should receive (almost regardless of the standard of the orders). A quick check list might be useful:
- Quite a lot of information about the enemy.
- Your tasks (but not your mission).
- The general area that you will be expected to be in. Note: This is written in blunt chinagraph and not carved in stone.
- Your boundaries and the general area of your neighbours.
- Your grouping.
- Any obstacles in your area and your responsibilities for them.
- Any piece of ground that is considered 'important' or 'vital' or for any reason must be held. You might be defending a bridge.
- A general idea of how the commander expects the battle to go and, in particular, where he intends the enemy to die. Note: This last may be an optional extra.
Armed with this lot, you now have to do your own recces and make your plans. What is the next question on all TEWTS after 'Point out the ground?' You guessed it. 'What is your mission?'. Surely we can bluff that one off. Well it is rather important. Just consider these little differences:
- Denying the area to the enemy means that all enemy that enter that area must be destroyed.
- Holding a specified piece of ground means that the enemy can enter and even pass through your area so long as you are not dislodged from the specific point.
- Destroying the enemy within boundaries means that you are not worried about any particular bit of ground as long as you eventually kill the enemy that enter your area.
Surely these make rather a difference to the way that you are going to plan your defence. Now what was it that the commander told you to do. and what were the tasks he gave you and were they in order of priority? Did you really pay much attention? If not you had better check it and make sure that you understand what your commander meant. Let us assume that you decide that you have got to 'destroy the enemy'.
Now you have got to get out on the ground because what follows cannot be done from a map.
 First of all think about the enemy and everything that you know about him. Then put yourself in his mind and look at your area from his end. With your fur hat firmly on your head, do his appreciation for him and work out where he would go — without any knowledge of where you might be, or even if you were not there at all. This is known amongst the staff-trained appreciators as the defining of the approaches. but those worthy officers rarely do what we have suggested.
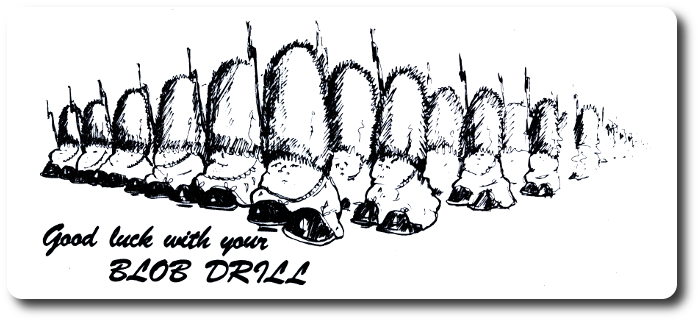
Once you have worked out his approaches, look for some areas that these pass through where it might be possible to kill him in large numbers. There should be one of these areas on each approach, although some may be well forward, some in the middle and some well back. You should now have a number of 'blobs' on your map and there may be rather a lot of them.
If you have got more than about ten for a battle group or about three for a combat team you may have got too many. Never mind: see if you can reduce the number to reasonable proportions by merging some of them together.
Once you have got your blobs you should look at the weapons available to you that can destroy the enemy's armour — and if you have not realised that you have got to stop the enemy's vehicles before you can get a crack at any of his soldiers I must assume that you are reading this from a wheel-chair or baby-carriage. Your inventory will probably include tanks, Milan, possibly Swingfire, Carl Gustav and LAW. Each has different characteristics, particularly in respect of maximum range. What you must now do is take each 'blob' in turn and look for places where each of your weapons could shoot into that respective blob. If you can mark these on a small-scale map or a fairly accurate sketch, it will make the next step easier.
Consider particularly the positions that you might select for your tanks and Milans. Certainly as regards range coverage, these should be interchangeable, but there is one important difference. You can move the tank around the battlefield and therefore a position that you want to fight a tank from does not have to be occupied all the time. The tank can simply be moved into it when required. On the other hand, a position with a Milan in it cannot be moved so easily and implies a defended locality with infantry round it for protection, and these infantry have further short range anti-armour weapons. What you are working round to is a number of options — those positions that you want to occupy (Milan), and those which you want to use to fire from but not necessarily occupy ail the time (tanks).
Once you have sorted out your options (but left them open) it is time that you turned back to your original orders. Is there any piece of ground that in must occupy because it is 'vital', 'important' or 'to be held'. This may well limit your choice, but if you have got any options left, keep them open.
You should now look back to the ground and work out where you would like to kill a dismounted enemy (either because you have shot him out of his vehicles or because he is assaulting you) and add in your GPMGS and SFs, not forgetting the MOS on your AFVs.
 So far you have not actually sited any organisations like platoons or troops, but you can now start some more doodling on your sketch. Look at the combinattion of weapons that go to make up a platoon or troop and try drawing the appropriate goose-eggs around the various weapons positions that you have sited. You should do this for all the options that you have left. The result may look extremely odd with the goose-eggs in extraordinary shapes.
Try a bit of massaging to see if you can improve matters. You can do this in two ways: first by shifting the odd Carl Gustav or GPMG a little bit towards another weapon to reduce the perimeter (but be sure that it can still do the job that you put it there for in the first place); or you can include a particularly spare weapon in a different perimeter from the one that you first put it in. Be careful over this step as it is the important transition from weapons to organisations.
If you still have some options left you have now reached the magic stage of 'Courses Open' — or 'Nearly There'. Now is the time to think about Depth, Mutual Support and all the other Principles of Defence and make a decision based on them. Decide where your HQ and other elements such as FOOs, MFC, Blowpipe and protective minefields should go and you are now 'There'.
So what? Well whatever other errors you may make, you have at least ensured that all your weapons can be used to good effect when the enemy comes. Your co-ordination should now be fairly easy since each weapon will have a specific area of responsibility to cover. It might have several if it's a tank, and this leads you straight into your various contingency plans for fighting the battle as it develops. There will be several of these, depending on which way the enemy comes and which 'blob' he enters. Clearly there is a lot more to this and there is no space here to go into such details as OPs to give warning of enemy approach into 'blobs' where he will be killed by tanks that move into certain positions. The Swingfire plot will also be tied into this — but at Battle Group or Task Force level across the whole from, by virtue of its range. Now what about fire control and what about night and bad visibility? Well of course this is only the start of the story but, unless it is got right, there is no chance of anything that follows being right. At least if you have got the gist of this article and practise it, you will have started the climb out of the ranks of Appreciation Situators. If you are totally confused, just remember; "Don't put your organisations on the ground and then try to work out what their weapons can do, start at the impact end of your weapons and work back from there."
- The O'Leary Collection; Medals of The Royal Canadian Regiment.
- Researching Canadian Soldiers of the First World War
- Researching The Royal Canadian Regiment
- The RCR in the First World War
- Badges of The RCR
- The Senior Subaltern
- The Minute Book (blog)
- Rogue Papers
- Tactical Primers
- The Regimental Library
- Battle Honours
- Perpetuation of the CEF
- A Miscellany
- Quotes
- The Frontenac Times
- Site Map
QUICK LINKS
- The Senior Subaltern
- Staff Duties and the Young Officer
- How to Write Effective English
- Notes and Quotes - Staff Duties
- Advice to Officers (1782)
- Mess Rules of the Infantry School (1884)
- A Dozen Military Epigrams (1901)
- How The Loafer's Bred (1904)
- The Promotion and Examination of Army Officers (1904)
- A Few Tips for Officers, Before and After Joining (1906)
- Standing Orders of The RCR (1910)
- Standing Rules for Officers' Messes of The RCR (1913)
- The Young Officer's Guide to Knowledge (1915)
- The Duties of an Officer (1916)
- An Open Letter to the Very Young Officer (1917)
- Advice to a Young Officer (1917)
- Battalion Duties; Officers, NCOs, and Soldiers (1917)
- Pleasing Infantry Brigadiers (1917)
- Role and the Responsibilities of the CO in a Battalion Mess (1917)
- The RCR, "A" Company Standing Orders (1918)
- Some Staff Duties (1923)
- An Officer's Code (1925)
- Hints on Promotion Exams (1925)
- On Writing Appreciations (1926)
- The RCR; Rules for Officers' Messes (1927)
- Morale And Leadership (1929)
- RCSI Hints for Young Officers (1931)
- RCSI Notes on Drill (1931)
- The Study of War by Junior Officers (1932)
- Self-Training (1934)
- "The Problem of the First Ten Years" (1934)
- Standing Orders of The RCR; 1935)
- Customs of the Service (1939)
- Drill and Discipline (1939)
- Leaders Win Where Commanders Lose (1939)
- The Officer and Fighting Efficiency (1940)
- Officers' Mess (RCAF, 1940)
- The Duties of an Officer (1942)
- Comrades in Arms (1942)
- Example Standing Orders - Subalterns (1942)
- Hints for Newly Commissioned Officers (1943)
- Completed Staff Work (1943)
- FOLLOW-ship (1943)
- Hints for Junior Officers (1945)
- Officer-Like Qualities (1948)
- Military Writing (1948)
- An Analysis of the Sub-Unit Commander (1949)
- Leadership (1950)
- Neptune's Notes (undated, 1950s-60s)
- Thinking and Writing (1953)
- Examination Tactics (1953)
- Officers (1954)
- On Writing Examinations (1954)
- Customs of the Army (1956)
- 1st Bn, The RCR, Senior Subaltern (1956)
- Pigs Have Wings (1960)
- Leadership and Man Management (1960)
- Officers (1964)
- 1RCR - The Sergeants' Mess - "Tips" (1971)
- 2RCR Junior Officer's Handbook (1973)
- How to be a Successful Subaltern (1978)
- Foreword to the Infantry Journal, No. 8 (1979)
- Do You Appreciate the Finer Points of Life? (1980)
- The RCR Regimental Standing Orders - Senior Subaltern (1992)
- Infantry Company Command (2016)
- A Miscellany of Advice for Subalterns
- The Young Officer and the NCO - Quotes